

So, let’s be real for a second. We know that classroom setup during COVID-19 and that none of the instructional arrangements during COVID-19 are ideal and you might be feeling anxious, uncertain, and overwhelmed at how this is all going to shake out. We get it and we’re here for you and with you. However, with or without Covid-19, we can take small comfort in the fact that every year starts with thinking about how we will set up and organize our classroom to meet the diverse needs of our students. That hasn’t changed. What has changed is that now we have this new layer to think about when planning our classroom setup which has to do with creating an environment for our students, ourselves and our paraeducators that matches the current guidance on teaching in a classroom during COVID-19.
As you move forward with planning and set up, your district guidelines, as always, will be your “North Star,” but we want to share some strategies for how to use a tried and true tool that will take your classroom set-up to the next level. That tool, friends, is floor tape! So, let’s dive into some considerations for room arrangement and how floor tape can support students’ understanding of how to navigate the classroom during this unprecedented time.
Room Arrangement and Air Circulation
The CDC has some guidance around proper classroom setup, recommending that, when possible, student desks should be placed at least 6 feet apart, and desks should be facing forward. In early childhood classrooms, that may look like reducing the number of students who can sit at a table.
TEA also recommends that classroom windows be open whenever possible to increase air circulation.
Creating Visual Boundaries with Floor Tape
We can create visual boundaries that will support students in their understanding of many different expectations. Visual boundaries help learners know where they should be at specific times during the day. These boundaries can be created with partitions, low furniture like shelves, tables, or chairs in a group area, fabric, rugs, carpet squares, and floor tape. We’re going to focus on the use of floor tape in our classroom setup because it’s one of the most inexpensive, effective and efficient ways to define spaces and clarify expectations within an area.
Using Floor Tape for Whole Group Lessons
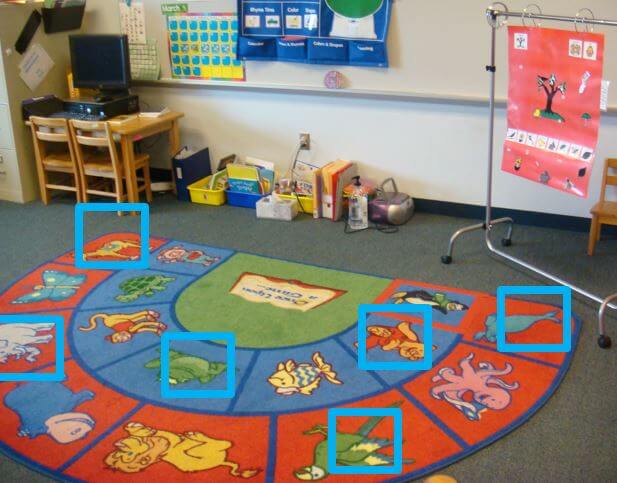
If younger students spend time learning on a rug during circle time, the teacher can use floor tape to make squares or X’s on the rug to indicate where students need to sit. Teacher areas should also be marked with floor tape to prevent students from wandering into the teacher zone.
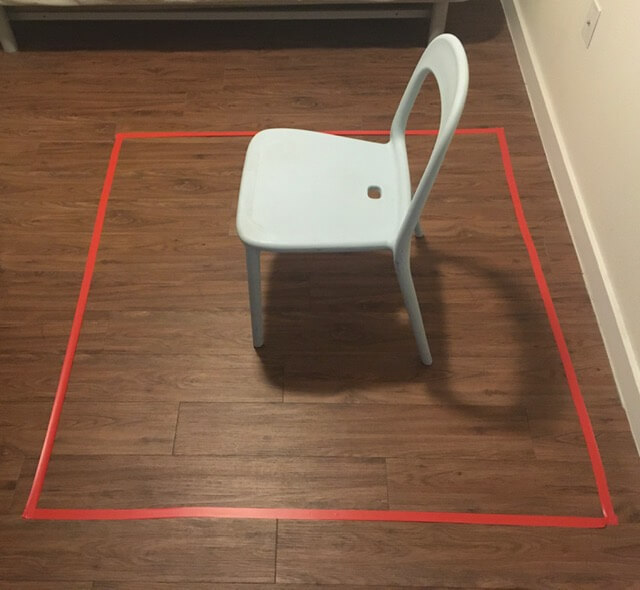
For older students who engage in whole group or independent work sitting at a desk, putting floor tape around desks and chairs can help them and their peers to understand where the space begins and ends.
Using Floor Tape for Table Work
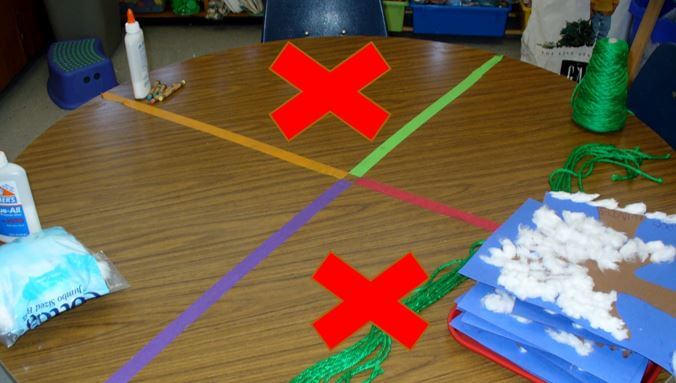
To define boundaries at a students’ tables, teachers can mark with floor tape to indicate which seats are not available. Also reducing the number of chairs at a table to correspond with the number of children allowed at the table can help.
Using Floor Tape in Centers or Small Group Work Areas
Floor tape can also be used to define personal space in early childhood classroom centers. One teacher wrote about using floor tape to create social distancing “pods” that served as mini “apartments” where individual students had access to sensory objects, manipulatives, books, writing or art materials, a table and perhaps a low shelf to further define space. The idea was to have enough diverse and engaging activities to keep the student motivated to stay within their area, and low furniture so that students could still see and chat with peers in different “pods.”
This is different from how we would typically set up the class, which would be centers devoted to a particular content area, such as dramatic play or sensory. These pods contain activities from multiple centers, so that’s a different way to organize, with the goal being to prevent students from transitioning to multiple areas of the room. For more information and photo examples, check out this blog post from himama.com on ways to social distance.
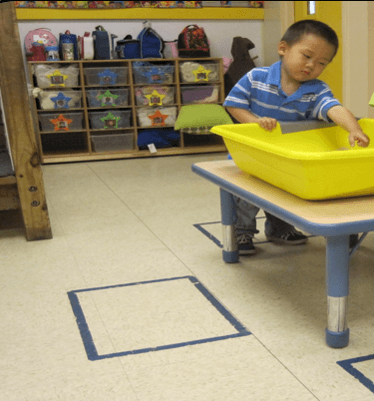
Within traditional centers, Floor tape can also show students where to stand and can help them understand how many people can participate in a specific activity.
Using Floor Tape to Show Where to Stand
Floor tape can be used to show students where they need to stand and wait during specific routines or in specific areas of the classroom. Kids are going to have to wait a lot more once they’re back at school to ensure appropriate physical distancing. They’re going to have to wait to enter the classroom, wait to exit the classroom, wait for the bathroom, wait for handwashing, etc.
Using Floor Tape to Show Traffic Flow
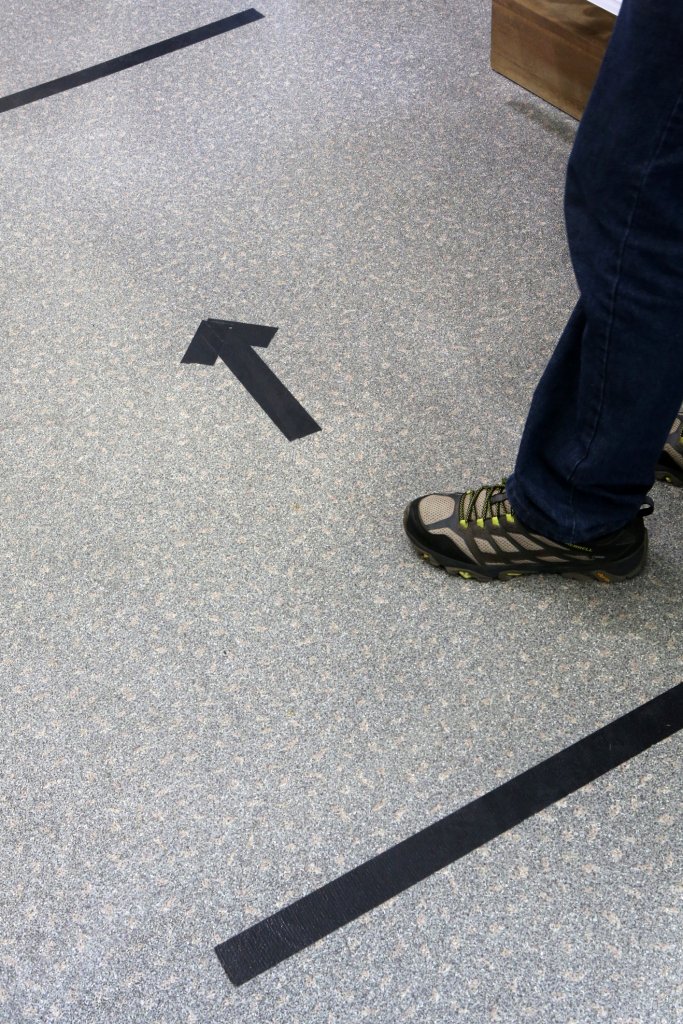
Floor tape can also be used to indicate traffic flow so that students don’t have head on “collisions” when moving around the classroom. You can use tape to create arrows that indicate “lanes” that show students which way to walk.
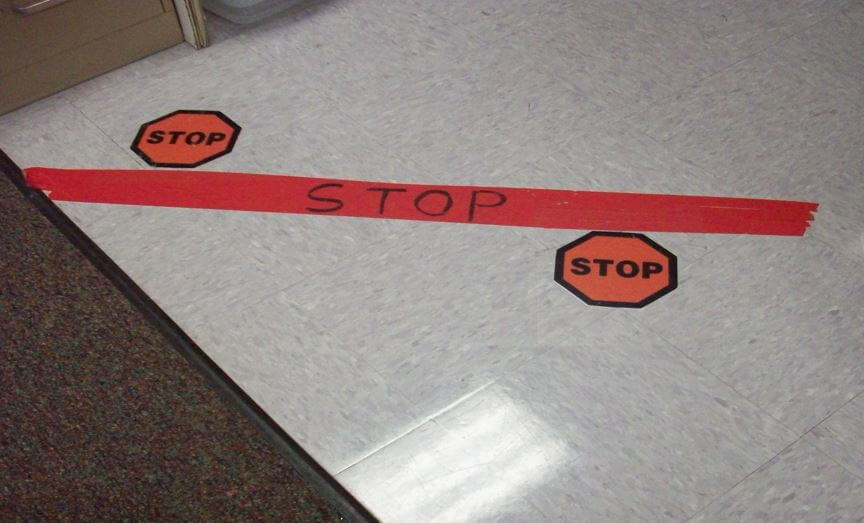
Teaching about the Floor Tape
As with any visual support, students must be taught what the floor tape represents. Our students don’t necessarily come to us knowing that a red line of tape in front of the bathroom means, “Stop and wait here!” This can be done in a number of ways but consistent practice, and support from adults in the form of modeling, prompting, and reinforcement will go a long way in getting your students up to speed. You might also consider color coding floor tape for specific purposes to further increase meaning. For example, you could use red floor tape for all lines that indicate “Stop and wait.” If red means stop then green means, “Go!” So, green floor tape could be used for arrows to indicate traffic flow. And, blue floor tape could be used to create boundaries for seating and work areas.
Stay tuned for future blogs on such topics as using picture visuals to teach safety expectations and considerations for creating and implementing routines during COVID-19. Stay safe, stay strong, and stay well, friends!
Resources:
https://www.cdc.gov/coronavirus/2019-ncov/community/schools-childcare/schools.html
https://tea.texas.gov/sites/default/files/covid/covid19-SY-20-21-Public-Health-Guidance.pdf
https://blog.himama.com/ways-to-social-distance-at-preschool-during-covid-19/

Jennifer Russell is an education specialist for the Early Childhood Special Education team here at the Education Service Center Region 13.


Nice ideas